Category Archives: Equipment

Vomiting Punch Bowl

For my local USBG Chapter’s Halloween party, my friend wanted to make a vomiting fountain punch bowl. He found this Makezine article where someone built one out of a doll head, but I didn’t like that build. For one, it entails putting a non-food-safe pump into a bowl of cocktail. I try not to be that guy, but pumps that aren’t food safe have all sorts of stuff you probably shouldn’t be drinking coming into contact with alcohol, a powerful solvent. Also, alcohol dissolves many plastics as well. Then there’s the rather dubious nature of trying to clean a pump that wasn’t designed to be cleaned.

I wanted to make a system that would be food-safe so I went with the same SHURflo pump I have in my camper. That’s a beefy pump meant for delivering the water in an RV or camper, and it’s got the really beefy pressure I needed to get that sucker really gushing. In fact I wanted to be able to dial it down a bit if necessary, so I added an inline ball valve.

If you want to build your own, here’s the parts list.

SHURflo Pump (115v, though if you wanted to make it battery powered you could get the 12v and hook it up to a car battery)

SHURflo elbow adapters (2x) to screw onto the pump.

½” ball valve to help me dial the flow down a bit if desired. (Totally optional.)

½” ID braided tubing which will serve as your line. The pressure gets pretty high and I learned the hard way that silicone tubing will inflate like a water balloon and start leaking.

¾” worm drive clamps or if you have an oetiker/pex clamper you could use those too.

110v plug end: because the pump doesn’t have a plug attached to it.


After that it’s incredibly simple. You screw the adapters onto the pump (using Teflon pipe tape) and clamp the hoses onto them. If you’re using the ball valve, put that on the output side of the pump by cutting the hose where you want it to go and clamping it in there. If you put it on the input side the pump will be pulling at full force and create a vacuum after the valve. Attach the plug end and you’re good to go!

A couple notes. First you can only turn the pressure down a little bit with the ball valve. Those pumps are designed to stop running when they hit too much resistance, because they’re meant to supply a sink in an RV. But even taking a little of the pressure off helps because it’s just a little too powerful. If your punch bowl is very large though it should be fine.

Second, don’t let the punch bowl get too low. If the liquid runs too low, it will start sputtering and shooting out wildly. And while the vomiting effect gets very, very real then, your cocktail will go everywhere. You’d be surprised how far it can blast that stuff. I plugged mine into a cheapo surge protector just to make a switch that could be easily accessed to turn it off if that happened. It did when someone adjusted the mask causing the liquid to spray out wrong.

If there’s demand I can do a video for how to set this up, but it’s easy enough that you can probably figure it out from just the parts list alone. There’s really nothing to it, and the only tools required are a screwdriver and something to cut the hose with.

I think for my next iteration I want to make a punch bowl with a barb welded into the bottom so that it drains easily. Using a pumpkin wasn’t my idea. It looked cool but the drink quickly took on a pumpkin flavor, it pumpkin solids were getting regurgitated too.

What we did with this one was buy a foam head, cut a hole through it, and silicone the tubing into place. That let us put a mask on the foam head. While this works, it’s fragile (it’s foam after all) and the mask can slip out of place and touch the stream of liquid and then you’ve got a huge mess.

The Styrofoam head worked well. It was easy enough to silicone it to a piece of scrap wood to hold it in place. With a hot foam cutter you can easily make a perfectly-sized hole for the tubing.


So You Want To Get Into Kegging Cocktails

Let’s say you’re a bar or a really enthusiastic home drinker and want to serve cocktails on draft. You’re wondering what it takes, money-wise, to get into the whole kegging thing. If there’s one thing I’ve gotten a lot of experience with over the last few years it’s kegging cocktails, so I thought I’d share some tips.

I’m going to recommend you don’t go the cheap route. I had initially included cheap components in my barebones carbonating cocktails post. I regret it. Every time I’ve tried to save money by buying something less than I really wanted, I ended up replacing it later, sometimes because it broke, sometimes because it sucked and I needed something better. I’ve talked to several people who’ve said the same. So here’s what I think you should get.

Necessities

Tank: $50.

clip_image002Find your local gas supply store and pick up a used tank from them. They’re cheaper that way. I think I got a 10 lb. tank for $50 last time, whereas a new one is $90. If you buy from the supply store, they’ll often let you just swap tanks later for convenience, so you’ll not have to worry about getting them recertified (which you’d otherwise have to do every 5 years for about $30). You also won’t have to drop it off then come back a day or two later to pick it up, you just walk in and swap it like exchanging propane at the gas station.

They’ll be a lot cheaper to fill than at the local homebrew store (LHBS) too. Usually the LHBS is buying from the gas supplier and reselling at 2-3x the cost. (They’re also using a different method to fill the tank  that is faster but fills it less, so you end up paying for CO2 you aren’t even getting!) Google for dry ice in your area, the local dry ice seller probably does tank swaps. I hear welding shops do too but have never been to one.

I’d get at least a 10 lb. tank. They’re only slightly more than a 5 lb. tank, and of course hold twice as much. For home use these last me quite awhile, however for my commercial stuff I blow through 10 lbs. for a good-sized event so I use a bigger tank.

Regulator w/cage: $85

Primary Double Gauge - CO2Get a good dual gauge regulator. It’s like $10 or $20 more than a cheap one. If you get the cheap one, you’re going to replace it later. I promise. I got the crappy Kegco I recommended in my first post for $45 on Amazon and it was the first thing that bit the dust. (Should have known from its 3.5 star reviews.) A crappy one is also going to require a wrench to adjust, whereas a good one can be adjusted by hand.

I love the Micromatic 642, pictured here. (I’ve only used a few, but it’s the best so far.) I’ve also got a couple of the dual regulators for when I need to set two different pressures. For bar service you’re probably going to want at least two different pressures available.

Get a gauge cage (or two if you go with the dual regulator). You’re going to have your tank tip over sooner or later, I promise. This will save it from busting a gauge and pay for itself quickly. I’ve had to replace gauges, they are very fragile.

You can do a double regulator on a ten pound CO2 tank, but it’s precariously balanced when full and a serious tipping hazard. Make sure to strap the tank in place. With a 5 lb. it won’t even stand up by itself. A 20 lb. is no problem even for a dual regulator, but still can be tipped so get the cage.

Perlick Adjustable Tap/Shank ($80)

These puppies aren’t cheap but boy are they worth it. Without them you have to use line length calculators and match the length of the line to the PSI of what you want to serve. If you’re just doing beer it’s not as bad. A lot of home brewers say they just serve everything at 12 PSI. I don’t do this, even with my beer, because some beer tastes better with more carbonation than others. If you want to be able to change your pressure you either need a flow control faucet or to be constantly swapping out the line.

If you’re doing cocktails you’re doing high PSI, and they can vary a bit more widely. (1) You need to either get an adjustable faucet or be constantly changing lines. If you want to serve different drinks at different pressures, and you probably will, you’ll want these.

Gas Line

As far as I can tell, gas line is just gas line. I usually buy whatever’s cheapest and I’ve never had any problems with any of it. Just do some rough math as to how far you want to run the line, then add a few feet in for good measure and you’re done.

Beer Line
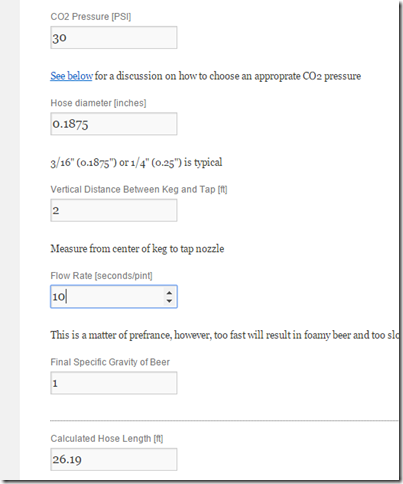
image Beer line lengths are a little trickier. Use a line length calculator to figure out proper pressure. Set your Specific Gravity to 1. Set your PSI to the lowest you’d carbonate anything at, which is probably around 30. If you followed my recommendation and got flow control faucets, then make the line a bit shorter than it says.

If the number that pops out is shorter than your run, you have to use line with a higher Internal Diameter (ID). The homebrew standard is 3/16” line.

You can see on the right, using some assumptions I made, I need 26 feet of line between each keg and the tap. Or, I could just get good flow control faucets and run very little. In my camper I’m serving at 40 psi on 12 feet of line and thanks to flow control I have no foaming.

Niceties

Manifolds.

I’m not counting the price on here, because they’re only necessary if you’re distributing gas. A manifold basically lets you distribute gas (at the same pressure) from one regulator to multiple kegs. This is quite useful if you are serving more than one thing at a given pressure, as it’s far cheaper than having a separate regulator for each. A homebrewer with a keezer might want a 2-way. A bar might go way more. If, like me, you’re doing several carbonated cocktails on draft, you can probably run them all off of one regulator with a big enough manifold. (I still have 3 of this 3-way manifold in the camper though because beer comes out at lower PSI and shaken drinks at higher, often with nitrogen. I can configure my 6 taps in very many different ways as a result.) I use 6-way manifolds when carbonating because I have to do a lot of kegs at once sometimes.

I recommend getting one with check valves. I made the mistake of not having them originally, and learned the hard way that that is a great way to get liquid to back up through the gas line. Then you have to clean everything out and dry it to avoid mildew, and you also might get product from one keg going through the gas tube and into another while shaking.(2)

Also, for safety, I highly recommend getting ones with pressure relief valves. Especially if you’re doing something with some particulate matter in it, like an unfiltered beer. I don’t think there’s really much chance of one exploding, and you’ve got relief valves on your kegs and regulators, but better safe than sorry.

Stainless Ball Lock Disconnects

If you’re kegging cocktails, you’re probably using homebrew Corny kegs. The standard homebrew disconnects are made from plastic. These break. Like all the time. The last thing you want is to be changing over a keg mid-service and have your disconnect break on you.

I love my stainless disconnects. They don’t break. I stepped on a plastic one once and it broke and lodged a chunk of plastic in my shoe sole. I accidentally ran a stainless one over with my Airstream and after I dug it out of the ground it still worked.

Another advantage, if you use the Liquid Bread Carbonater, it was redesigned to not allow the ball lock disconnect to stay on, which makes it a huge pain in the dick to use. (The old red ones were not like that, the new blue ones won’t allow it. If you don’t already own the liquid bread, I highly prefer the newer stainless ones as a result, but if you’re like me you’ve probably got a few of the old ones kicking around.) A stainless disconnect will clamp on to any of them.

Also, some of the stainless ones come with an MFL connector rather than a hose barb. That’s useful if you need to use line with a larger ID than 1/4”. (Which would be rare.)

If you have any questions about any of this, feel free to drop it in the comment section. In my next post I’ll give you a great couple recipes.

Notes

1. In Liquid Intelligence, Dave Arnold recommends the pre-mix soda valves by C.M. Becker. I called them when I was building the camper and had them make me four of them. I can’t say enough good things about that company’s customer service. The owner himself got on the phone with me and made me what I needed. That kind of thing doesn’t happen much these days.  

Unfortunately the quality of service is much better than the quality of the valves themselves. The shanks were a pain in the ass to install in my beer tower. They’re just a tiny amount larger than a normal beer shank, so getting them in without stripping the threads with a wrench was a bitch. The nut/hose barb at the end leaked like crazy and I had to use PTFE tape and plumber’s putty, something I’ve not experienced on the several beer shanks I’ve used. Even then it was a pain to get to seal properly.

And worse the product is unreliable. It’s made of a chintsy plastic, rather than stainless. Even if you don’t worry about plastic touching your high alcohol, high acid cocktails, they just look bad. But I’d deal with that if they worked ok.

Unfortunately they do not. They have a flow adjustment valve on the side, but it’s odd. It rotates all the way around (the Perlick only rotates maybe 180 degrees) so it’s hard to tell where you’re at, and it doesn’t seem to do much regardless. I constantly experience dripping. I can have three faucets hooked up to three kegs that have the same pressure and get a trickle out of one, a torrent out of another, and the middle one be just right.

The one that’s just right will be incredible though. You can pour a highly carbonated ginger beer out at 32 PSI and see no foam at all. When they work they do a better job of keeping the bubbles in than a Perlick, but they just aren’t reliable enough for service.

2. For instance I was once force-carbing a couple sodas. I had shut off the gas at the regulator, but left all the ports on the manifold open and vented all of the kegs. When I shook one keg, the higher pressure in it forced the soda through the gas line, through the manifold, and into another keg. Thankfully they were the same soda so the product wasn’t damaged, but it’s a bitch to disassemble your setup, disassemble the manifold, then force cleaner through the whole thing.

Also for my launch party I had left the gas on in the camper as we drove to the event. Big mistake! The shaking caused by bumps in the road flooded all of my gas lines with a mix of six different cocktails/mixers/beers. Gross! I didn’t realize what had happened until days later, and the manifold and gas lines were so gross I just threw them out.

Happy Camper Launch Party

Two weeks ago I did the launch party for the Happy Camper Bar Car. My new business, the Happy Camper is basically a food truck for booze built into a 1972 Airstream.

101115_edit_happycamper_095

Backstory

Two years ago, growing dissatisfied with my day job, I was considering starting a food truck with my brother.  My real dream was to open a bar, but it seemed so mysterious and expensive at the time. I’d never worked at one. They needed all sorts of fancy equipment. My brother has been a chef for a long time so I wasn’t worried about the cost or knowledge involved in doing a food truck, but a bar? No way.

We never ended up doing it though because my brother was going to drop out of school to work on it, and I didn’t want that. I ended up taking a weeknight job at a bar, for just long enough that I felt comfortable owning one. Not that it’s rocket surgery, but just working at one for let’s say 25 to 50 shifts will save you a lot of headache. You’ll make a lot fewer mistakes than you would if you went cowboy and did it yourself, and someone will pay you for the education. It’s a no-brainer and I’m glad I did it.

I felt ready to start a bar. So I started looking at real estate. I found a spot I loved. It was owned by the county and they wanted the building do prop up the convention center next door. The door to my bar would be directly across from the door of the convention center, which meant a hundred thousand people a year would stumble out of a miserable work event looking for a drink and mine would be the only one in sight.

It was stripped down to brick and concrete. It had these beautiful cathedral ceilings because the building is built on a hill and it was at the bottom, with a gorgeous window above the high door. The perfect speakeasy. All it needed was a bar and some Edison bulbs hanging from a pipe.

The one small wrinkle was that they wanted to sell the building to make a hotel. They’ve been trying to make a deal for that for years and failing, but they didn’t want to do a lease longer than a year just in case. Which made it hard for me to justify putting much money into it, even though I think that hotel is about as likely to occur as a zombie outbreak.

But mysteriously, they were also getting a renovation budget from the county to turn it into usable space. They seemed like they might be amenable to letting me using said budget to build my bar instead of putting in generic carpet and white drop panel ceilings like the old UPS store next to it.

I was feeling optimistic. And that’s when they found asbestos. The cost for them to remove it would have been more than I paid in rent for six years, so understandably they decided to just wait for the zombie apocalypse. So the one spot I wanted was gone.

I could have looked for another. My city’s downtown has plenty of vacancy. But that’s when I saw a couple people online doing food trucks for booze.

Sure, I’d joked about that several times. But the inability to get a liquor license seemed like a deal breaker. Except, of course, if you do private events. Then you don’t even need one. What a great loophole.

It goes really well with what I love doing. I really like batching cocktails. There are so many advantages to them over made to order ones. You have more control over dilution and chilling when you can divorce the two. You can ensure a level of consistency far beyond even the best bartenders. You can make things bubbly. You can serve people the highest quality cocktails at beer speed. And most importantly, you can do it without ever washing dishes. The weight of the water it would require to be stirring and shaking on the Airstream wouldn’t fit on the axle.

So when I found the loophole that made it possible, I was talking to my good friend Heather and she wanted to jump into it with me. We went for it. We went from talking about it to owning a stripped-bare Airstream in under a month, and having a party three months later. Do that with a bar!

The Launch Party

Fast forward to four months later. The trials and tribulations involved in getting the Airstream ready would make a blog post, or maybe a book but we were past it and it was time for the launch party. The girl doing the interior woodwork was coming down to the wire. The party was on Sunday and I got a bar top installed Saturday afternoon. Ever built out a tap system in a couple hours? It ain’t easy! I knew I’d have to run to the homebrew store for something, and they were only open until 5, so I got started ASAP.

101115_edit_happycamper_002

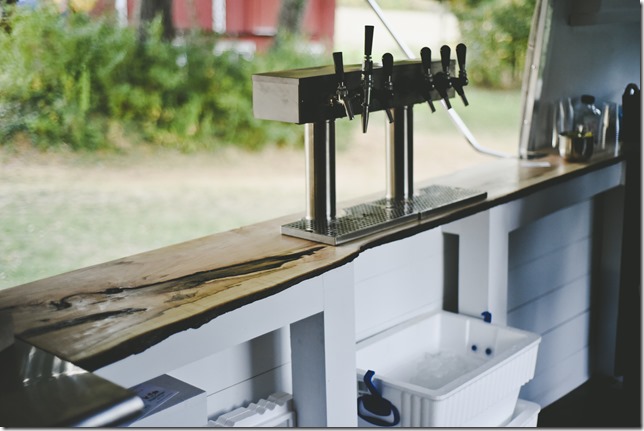
Thankfully I’d done everything I could beforehand. I’d cut all of the beverage tubing and drilled holes in the side of the fridge to run it through. I’d made sure I could fit six kegs and two gas tanks (one CO2, one nitro) in the left-hand side of the fridge. I’d installed the shanks and valves, including four custom post-mix soda valves on beer-tower sized soda shanks made for me by CM Becker. All we had to do was screw the towers into place, run the lines, and connect the liquid disconnects.

It went off without too much trouble. I turned out to be one tap handle shy because we never had time to make our custom ones (next time) but that was all I really needed from the homebrew store. I built the system and ran each drink through its line.

On the far left was beer on draft. I’d simply gone to a growler fill and filled my 3 gallon Corny Keg and recarbonated. The next drink was one I made up featuring Rittenhouse Rye, lemon, apple cider, Aperol, and mulled simple syrup.

We had my homemade ginger beer on draft for mule variants, including my brown butter dark and stormy. We had Jack Rudy tonic force-carbonated in another keg.

The last two were cocktails. One is Chartreuse and root beer. It was an idea I’d gotten from Chris at A Bar Above (I think) and have been playing with for a long time. For this version, which is by far the best, by the way, I used:

1.5 oz. Chartreuse

1 oz. Monin Rootbeer Syrup

5 oz. Water

1 dash orange bitters

I scaled that up to a few gallons using my handy dandy cocktail calculator then force carbonated at 32 PSI at about 28F. Do yourself a favor and let this one rest a day. I made some to test and tried it day of, and it tasted like it needed more orange bitters and Chartreuse. Then I tossed the rest back in my fridge and forgot about it until Heather came over a couple days later. I tasted it again then and it was magically the greatest drink of all time.

The last tap was my carbonated serrano margarita. Maybe I’ll explain the recipe for that one some time in the future. It’s a blog post in and of itself.

Here’s the full menu:

LaunchParty_2

Lessons:

#1. Detach gas lines from kegs before driving down the road. Turns out liquid can back up into the gas lines, and from there up into your distributors and regulator from the sloshing. I spent the first half-hour trying to unjam the kegs as a result. One of them got halfway empty and never flowed again.

#2. Keep your tap lines accessible. Ours are hidden behind the bar and wrapped in insulation. It’s a bitch to get to them and if something jams, I’m screwed. (I don’t think I need glycol, the stuff never sits around enough to get cold, but if it starts foaming due to temp I might build an air-cooled system. I don’t anticipate having to do so though, insulation should be good enough.)

#3. Move the CO2 tanks outside of the refrigerator. I had not accounted for the fact that I’d have extra kegs that needed to stay cold, so room in there was at a premium. I’m going to drill holes in the right for two lines, and set up quick disconnects in the fridge so I can easily swap out distributors. That’ll make the whole thing much more organized and easy to troubleshoot if something goes wrong.

#4. Test the Airstream with a non-contact tester before every event. This didn’t happen at the party but later at my house, thankfully. My house is really old and my garage has a GFCI in it into which I plug the camper. You’d think that’d make it safe, and it probably would if whatever idiot wired it decades ago hadn’t had current coming out of the grounding wire. An Airstream isn’t grounded because it sits on big rubber tires. And the shell is highly conductive. So it zapped me. You just never know what you’re going to be plugging into, and if an electrical source is wired wrong a customer could get seriously injured!

#5. People really love home-made ginger beer. It was like half the drinks that walked out. I’ll account for that at future events. I was a little worried that my menu was a little too hardcore for casual cocktail fans. Not so. I think I sold one drink with tonic in it the whole time. I’ll probably repurpose the remaining case of Jack Rudy for a special drink, like an Elderflower G&T on draft, and use one more cocktail and one fewer mixer generally.

#6. I should have spent more time calculating the PSI needed before I ordered the parts. The lines were 12’ long, plus there’s a 2 foot rise, and that’s too much resistance for 3/16” ID line. I had to pump it out at about 35-40 PSI. Good thing I never had to use my personal remanufactured ball lock keg, it vents around there. (Note to self, fix that.) Our new ones don’t even seem to vent at 55, which is the highest I’ve taken them, but still. I couldn’t figure out why the beer wasn’t flowing well when the event started, turns out I was just way off on that.

The shaken drink on draft relies on a lot of pressure forcing it through the stout faucet. At home on my personal equipment, 30 PSI gets a great drink. That’s about 22 PSI more than I’d serve a carbonated drink at. I couldn’t even get the Fireside up near that, so it ended up with a texture I wasn’t 100% happy with. Still tasted good but wasn’t perfect. So I’m switching to 1/4” ID line. That’ll let me drop the pressure way down to about 8.

Anyway, I would say overall the party was a success. The drinks were really good. When the taps jammed I spent a half hour fixing them, but we got through it. I then spent two hours wanting to go behind a shed and cry! But I muscled through that too. And then it was over.

I’m pretty optimistic about our venture. We’ve now cleared most of the major hurdles that were worrying me. I’ve got another venture I’m working on to go right alongside it too. And I’m going to greatly improve the batching app. And I’m even working on a book about batching drinks too. So stay tuned.

Carbonater

When I first started carbonating, it was with an ISI Whip. That did the job but ultimately I desired something that gave me more control over the level of carbonation (your options with an ISI are pretty much one canister or two) and at lower cost.

My next step was the home-built system. I already brewed beer so having a full kegging setup was appealing anyway.

I at first attempted to follow the instructions I’d heard from Cooking Issues. Purge the air from the bottle, lock the valve into place, and shake until I stopped hearing the CO2 hiss. The only problem I had was the valve never locked. I had to apply a pretty large amount of force (using two hands) to get the valve on at all, and if I let go it popped right off. So I would charge, shake, charge, shake, etc. Doing this about ten times was a pain in the ass but it did get the job done.

Because it was so much slower though, I tried to fix it. I bought a couple other Liquid Bread Carbonaters in case mine was broken. It wasn’t. I bought another ball lock gas disconnect in case that was broken. It wasn’t.

When Liquid Intelligence came out I noticed in one of the pictures that Dave was using the red carbonator. Mine were blue. I had known the different colors existed, but assumed that was the only difference. A lot of digging into product reviews made me realize it wasn’t.

The older red Carbonaters were better-designed. They allowed the valve to lock on, and the spring wasn’t as forceful so you could reasonably push the poppet valve down to let gas escape. The new ones are, some reason, got rid of both of those major advantages.

So I looked around on Amazon and found this. It’s a stainless steel version that does what the old Carbonater used to do. You can lock the disconnect on it just fine. It also has a hose barb at the end sized for standard beverage tubing (like you’d buy at the homebrew store) so you can inject the CO2 into the liquid, rather than the headspace above it, like you do in a SodaStream.

So I thought I’d just share this here. It ships from China so expect to get it a couple weeks after you order it. But it does seem to be very well-made and is much more pleasant to use than the unfortunately-redesigned Carbonater.

Clear Ice

This is the second part of my series of recipes from Liquid Intelligence. I’m going to make all of them, which you can see here.

In Liquid Intelligence, Dave Arnold explains how to make clear ice. What makes ice cloudy is solids and gasses dissolved in the water. As an ice cube freezes, the water freezes into crystals first, forcing solutes away from the new ice crystals. Because the ice in a normal freezer is freezing from the outside in, those solids are forced toward and concentrated in the center of the cube.

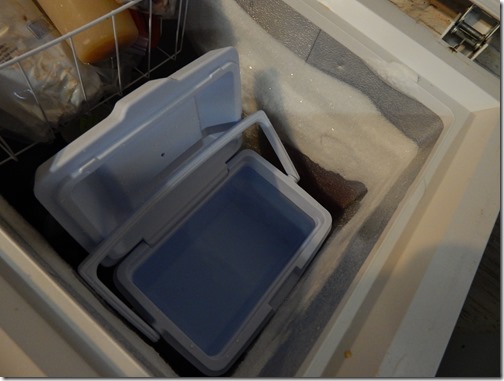
The solution is to do what an ice sculpture machine does and freeze from one direction to the other. The easiest way to do that at home is via insulation. Put your water in a cooler, and leave it in your freezer with the lid open, and it will freeze much faster from the top than from the sides and bottom.

So I bought a small 10 quart cooler from Amazon. You’re supposed to load it with hot water, since hot water has fewer gasses in solution. You want to let it drop in temperature as much as possible before putting it in the freezer, otherwise you’ll get a ton of condensation from the evaporating hot water on everything else. Figuring it would take a year for the hot water to cool in the insulated cooler, I put the hot water in a stockpot until it cooled to room temperature, then gently poured it into the cooler, which I then placed in the freezer.

Here’s a picture at the start:

Ice in cooler in freez

You might not be able to make it out from this image, but after about one day the ice was frozen a couple inches from the top.

DSCN0112

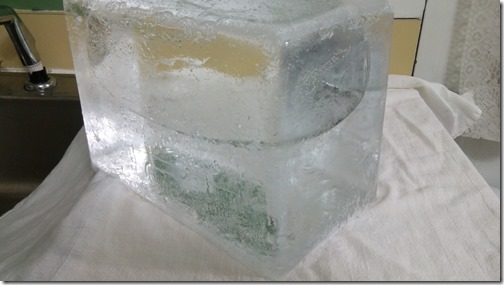
After another day (approximately 50 hours in) I took out the cooler and unmolded onto a towel next to my sink. (I need a large bar mat for next time!)

2014-12-07 17.49.55

As you can see it was only frozen about halfway through. I wanted to practice cutting it anyway, figuring my technique would need some work, so I didn’t put it back in the freezer and just went ahead. I suspect a third day would have it frozen very close to the end.

I first cut off the unfrozen part, of course drenching my kitchen in the process. After trimming it, I got about a 2.5” thick slab. Here’s what it looked like:

2014-12-07 17.57.46

Arnold’s method of cutting is pretty simple. You use a large serrated knife (I used my bread knife, since I almost never cut bread anyway) to score the ice on both sides. Then you simply put the blade into one of the grooves you created and tap on it and voila. Arnold is right when he says that it looks a lot more impressive than it actually is. Here it is cut into columns, with one column cut into chunks:

2014-12-07 18.04.40

I used it in an Oaxaca Old Fashioned from Death and Co.

DSCN0115

Bar Equipment Part 1: Shake and Strain

One question I see often on Reddit Cocktails is what bar equipment someone starting out should buy. There is a rather bewildering array of stuff out there, but very few things you actually need. Even in those necessities, however, there exist many variants. So I thought I’d write up a series to get you pointed in the right direction.

First up, shaking and straining. Most cocktails that aren’t all liquor require one (and usually both) of these.

There are three main types of shakers on the market.

1. Boston Shaker

clip_image002

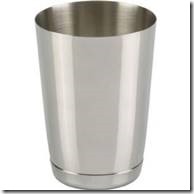
You’ve probably seen this one the most in American bars. It’s just a metal tin that’s somewhat conical in shape so you can tighten onto a pint glass. You hit the top of the glass with the heel of your hand to close it. And you hit the side of the metal tin with the heel of your hand to release when you’re done.

These are very cheap. Here’s one on Amazon for $6. You might break a pint glass every now and then, but what’s that, $1? Also, you can get a cheater tin to replace the pint glass:

clip_image004

The downside is that your method of shaking them has it right by your ear. For a home bartender you’re probably not doing that enough to matter, but for a professional this constant percussion can cause tinnitus. If I were bartending full time I’d prefer another method just for that reason.

2. Cobbler Shaker

clip_image005

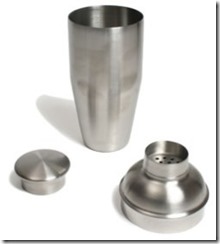
The Cobbler is a 3 piece shaker. When assembled, it looks like this:

clip_image007

The primary benefits to a Cobbler are that you don’t need a Hawthorne strainer, and that you have more freedom with how you hold it. That’s why people doing the bad ass Japanese Power Shake don’t use a Boston shaker. That also means it doesn’t have to be right by your ear.

The downsides are that you have 3 pieces to deal with, and the top piece is a little more annoying to clean than a pint glass. And the cap often freezes onto the top piece after you shake. It can be a pain to remove, and you often give up and just use a strainer anyway. That’s why my personal favorite is the…

French (Parisienne) Shaker

clip_image008

It’s like a Cobbler Shaker, except the top is just one piece. You still have to use a Hawthorne Strainer, like you would with a Boston. But you were going to do that with a Cobbler anyway once the cap froze. And it’s similar shape to the Cobbler means you can Japanese Power Shake all night. (Sounds dirty, doesn’t it?)

Whichever shaker you go with, the basics are all the same, so grab the one that appeals to you the most and then don’t worry about it.

Ok, so now we’ve got our shaker. Whichever one you choose, you’re going to have to strain most of the stuff that comes out of it.

Hawthorne Strainer

clip_image010

A barman’s best friend. I don’t know who Hawthorne was, but he’s the reason you don’t have ice in your Negroni, so if you see that guy give him a hug. These cost under $5 at Amazon.

clip_image011

For a couple bucks more, OXO makes one without a handle that I quite like. I just like the way it feels in my hand a little better. I wouldn’t go throwing away my old Hawthornes for it, but if you don’t already have one, it’s worth the extra $2.

Julep Strainer

clip_image013

This bad boy is for making juleps. ‘Nuff said. Not a necessity, but also it’s only $4.47 and everyone loves a julep. It also works just fine for most stirred drinks if you’re using large enough ice cubes that it will hold them in the stirring glass.

Mesh Strainer

clip_image015

While a Hawthorne is great at holding back ice, it’s too large to hold back anything finer. Since nobody wants lemon pulp in their Tom Collins, you should have a mesh strainer.

The good news is they’re also cheap. This one is currently $7.45 on Amazon.

When you shake something with a pulply fruit juice like citrus, or muddle something like mint, or whatever else small that you don’t want in the final drink, pour it through both a Hawthorne and this bad boy.

And for the record, yes those are Amazon affiliate links. Each one I linked to I have purchased and highly recommend. Even if you buy them all I think I get like $2, so please don’t think I am trying to rip you off dear reader.

Carbonating Cocktails at Home Part 2: The Homebrew Rig

I’ve talked about a few solutions for carbonating cocktails, but there’s really only one if you’re serious: the homebrew rig. I call it the homebrew rig because it’s basically the same setup us homebrewers (yes, I am a man of all beverages) use for kegging our beer.

The setup is quite simple. Here are the parts you need. Prices are subject to some fluctuations, but I’m just using current Amazon prices as of October, 2014.

1. A CO2 tank. $68.95. You can get any size you like, but unless you’re running a bar and carbonating drinks on the regular, you won’t go through much of this stuff. Here is a 5 lb. tank on Amazon for under $70. A fill of that bad boy will probably last you six months to a year even if you, like me, like everything with a little fizz.

I got my tank from a dry ice shop near my house. They only charged me $50 for a used 10 lb. tank. They test and replace it when needed too, so I’ll never have to buy another. It’s old and ugly, but I keep it hidden out of sight.

clip_image002

For refills, anywhere that sells dry ice will usually do. Just let them know you’re using it for food. Also, many homebrew shops, which I prefer since they already know what you’re using it for and will sell the acceptable purity exclusively.

2. A dual gauge CO2 regulator. $46.90. This lets you adjust the pressure that you use in your carbonating vessel. Here’s the one I got. It’s decent, and cheap. I’d like it better if it were a little easier to adjust the pressure. It’s quite difficult to turn by hand, but a wrench makes it easy.

clip_image004

I’m getting ready to build a dual keg chest freezer, and am going to upgrade to a dual one so I can get a whole keg of a cocktail and/or seltzer in addition to one of beer going. I’m sure I’ll be posting on this bad boy setup later.

3. A ball lock gas coupler, and a gas hose. $16.29. This one has them both together. The hose needs to be pressure rated, and of the right size for your regulator and ball lock valve.

clip_image006

There are a couple ways you can screw up ordering this part. First, there are two different types of ball lock couplers, one for gas and one for liquid. Usually the gas ones are white and the liquid ones are black. If you are kegging a homebrew, the white one is what connects your pressure regulator to the CO2 inlet, and the black one connects the liquid outlet to your tap. For the purposes of carbonating beverages, rather than kegging, we don’t need a liquid coupler.

The other way is to get the wrong size hose. Usually your regulator will have a 5/16” barb on the end to connect the hose to. Keg couplers though come in ¼” and 5/16” for some reason. (Maybe there’s a ¼” regulator that I just haven’t seen.) Either way a 5/16” hose will probably clamp onto both just fine with a screw clamp, but you’d be safest buying them all to match. I got a 5/16” regulator, hose, and coupler.

4. The Carbonater. $12.64. This little bad boy screws onto any standard pop/seltzer bottle. Everything from the little single serving plastic Coke bottle you get at a gas station up to the 2 liter bottle. They all have the same cap.

clip_image008

5. Plumber’s tape. $3. For making sure to get an airtight connection between the coupler and the tank.

6. A good adjustable wrench for tightening the regulator. You probably have this one already so I’m not going to count it in the total. Also a screwdriver for turning the screw clamps that come with the hose.

7. A standard soda bottle. Just get a 1 liter of seltzer from your grocery store and save the bottle and cap. It’s useful to carbonate things in small quantities, or you’ll just end up re-carbonating the other half after the first one goes flat.

Total cost: $144.78. Not bad right?

The setup is incredibly simple, even if you’re totally inept and handyman activities like I am. Trust me, you’re very likely not as clueless as I am, and I did it in ten minutes.

Step 1. Connect regulator to the CO2 tank. Wrap a little bit of the plumber’s tape around the threads on the tank. Then screw the regulator on, tightening as much as possible with a wrench.

Step 2. Attach one end of the hose to the barb on the bottom of the regulator. Turn the screw clamp until tightened. Attach the other end (if it isn’t already) to the ball lock valve’s barbs, and tighten the screw clamp.

Step 3. Test for leaks. Get a glass and put a squirt of dish soap in it. Shoot water out of your sink’s sprayer into the glass to make a ton of bubbles. Take a sponge or paper towel and wipe those bubbles everywhere there is a connection. Where you screwed your regulator into the CO2 tank. Where you clamped the hose onto the regulator and barb. Turn on the gas. If there’s a leak, you’ll see the bubbles moving.

That’s it. Told you it was easy. Now let’s make our first carbonated cocktail. I’m going to go with an old-school carbonated classic, the Negroni.

In a 1 liter bottle, add:

6 fl. oz. gin

6 fl. oz. Campari

6 fl. oz. sweet vermouth

4 fl. oz. water*

*Note, because we’re chilling in our refrigerator, we don’t get the dilution you’d normally get if you stirred a Negroni with ice, so you want to add water. How much exactly is up to you. I use 25% as a launching point for drinks, but some I like more, some I like less. Let your taste-buds guide you. I find I like a Negroni a tad under-diluted, but your mileage may vary.

Put in your refrigerator until fully chilled. I’ll even go so far as to set the bottle in my freezer for a little bit after that before carbonating if I have time, just to get it extra cold. (Avoid freezing of course.) If you don’t want to wait you could instead omit the water, stir the Negroni with the correct amount of ice until it has chilled (which will give it the correct amount of water) and then pour it into the bottle.

When ready to carbonate, screw the Carbonater cap on most of the way. Squeeze the bottle until you’ve eliminated all of the air, and then finish tightening.

Set your pressure regulator’s gauge to the desired fizziness. I like about 35 PSI.

Attach the ball lock coupler to the Carbonater. You have to push down fairly hard to get the gas to flow through, which is a bit of a pain when the bottle is limp. I am told older Carbonaters were much easier to make work, but the current ones require a good bit of pressure. I thought mine was broken at first, so that is normal.

The bottle will fill and immediately grow from limp to rigid. Shake vigorously. When you do, CO2 will dissolve into the liquid and the bottle will go limp again. This is because dissolved gas takes up much less space than undissolved, forming a semi-vacuum above the liquid.

Keep repeating this process until the bottle no longer goes limp after shaking. Yes, I know, “that’s what she said” jokes abound here.

Place the bottle in your refrigerator for a bit. After a half hour or so, you can remove the Carbonater cap very slowly and replace the bottle’s normal cap if you so desire. Always remove caps slowly, as it will reduce loss of carbonation to foaming.

Your bottle will contain 4 servings of Negroni. If you don’t use it all at once, put the Carbonater back on and charge again, without shaking. Place the bottle back in the refrigerator. This will keep it from going flat.

Hot Toddy Machine

Recently a friend gave me one of these siphon coffee makers.

I decided to try the Rittman Heights apple cider hot toddy from below in it. It was my first time using it. I figured I could mull the beverage by putting the cider in the bottom glass, all of the spices in the top glass, and then just putting the rum in the cup. I used a charred cinnamon stick to swirl them together.

I think this actually turned out to be a pretty neat presentation. I can imagine at a bar a waitress presenting the siphon to the table, especially if a couple people bought it, and letting it run for awhile. You’d have to warn them the drink took 10-20 minutes and that maybe they’d like it as a second beverage or something though.

If I’m not mistaken, I remember once seeing Aviary had toyed with presenting hot drinks that way before settling on the Porthole instead. The Porthole has the advantage of being able to serve from right away, and being able to watch as the spices meld with the beverage. It’s also far more practical for service.

So maybe this will be nothing but a one time thing. But regardless I thought I’d present it here.

Carbonating Cocktails at Home Part 1: Your Equipment Options

Note: This is the first in a series of posts I’m doing on carbonating your own cocktails at home. There will probably be at least 4 or 5 parts, including some recipes at the end. My plan is to publish 1 a week until they’re done, so if you’re interested, please stay tuned.

I like my beverages bubbly. Let me just state that right off the bat. Things just taste better with a little fizz.

Over the years, I’ve gotten my fizz fix by a number of different methods. I’ve purchased good old seltzers and tonics at stores. I bought an ISI Whip and a SodaStream. And finally, I built my own home carbonation rig. I’ll walk you through the options. I’m going to focus mainly on use for carbonating cocktails here, but mention where things are useful for something else.

Store Bought Seltzer

seltzer

Buying seltzer seems cheap, but it adds up. I easily go through a liter a day of bubbly water. At my local store, the generic brand, which is just carbonated reverse osmosis tap water, sells for 75 cents a pop. Over the course of a year that’s almost $300!

The upside is it’s easy. I was going to the store anyway, so there’s no real extra effort.

The downside (other than cost) is that seltzer is pretty much the worst possible way to add bubbles to any cocktail. You can’t add seltzer without also watering your cocktail down. And it tends to foam out due to agitation when you pour it or attempt to stir it into the drink. (This is why beverages that use it typically pour it in at the end, leaving a top watery layer above the cocktail.) Also, store bought seltzer is only mildly-carbonated to begin with and like I said earlier, I like my bubbles.

SodaStream

sodastream

A SodaStream just makes seltzer and is a minor step up from buying it. Their CO2 tank, which they claim can make 60 liters (and I find makes much less in practice, but I’ll be generous and say it is 40 liters) costs $45 on Amazon. That’s the same as just buying seltzer, but you have to buy the SodaStream too. You can get the tanks swapped at a store for $15 which makes it probably on the order of $0.38 per liter of seltzer, which to me is enough to justify the initial purchase if all else where equal, but not an overwhelming savings. Even the cheap SodaStream model is $70, and the good ones are closer to $100. You’ll want a spare cylinder or two so you don’t go empty, and a spare tank or two, but even still you’d break even over store bought seltzer in about a year or two.

It also lets you get your water a little fizzier than store-bought seltzer. I have never tested mine to see exactly how much CO2 gets in there, but it’s noticeably fizzier. You have a little control over how much CO2 you add as well, but not much. There’s no precise way to regulate it, you just push the button more or less.

The major drawback to the SodaStream is that you cannot carbonate anything but water directly. Want to make soda? You just make seltzer and then mix the syrup with it. (There’s no reason you couldn’t just buy the syrup and some seltzer from the store and make the same exact thing.) If you put anything else in the SodaStream, it can foam up and ruin the device. I learned that the hard way.

So it has all the downsides to store bought seltzer, plus having to deal with CO2 tanks. It is a little cheaper in the long run, but I really cannot recommend it over other methods unless you’re drinking nothing but carbonated water.

Whipping Siphons

isi

Whipping siphons also work and for a brief minute were my solution because I already had a couple. You can get a 1 liter whipping siphon for about $90 if you look around online. (You want the bigger one because you pretty much need 2 CO2 cartridges regardless, so you might as well get double the fizzy beverage and cut your cost in half.) I’m a huge fan of the ISI Gourmet Whip, which is a little pricier, but if you’re already going to spend that much you might as well plunk down a little extra for the better model.

There are two main problems with siphons for carbonating. The biggest is the price of CO2 cartridges. Ordered from the net in bulk you can get them as low as about 35 cents a cartridge. But to get sufficiently bubbly water requires 2 of them, so you’re looking at about 70 cents a liter. Not enough savings to be worth buying over store bought, though the upside is you’ll get heavily carbonated water for that price. The pressure achieved in an ISI is enough to carbonate slices of fruit.

The other problem is that you don’t have a lot of control over the levels of carbonation, as you are stuck with whole cartridges of CO2. You can partially vent them, doing sort of a pseudo half-charge (thanks for the tip on that on ChefSteps) but this is very difficult to get any accuracy with.

As for the benefits, you can carbonate cocktails better with one than you can with seltzer water or a SodaStream. And they’re awesome for lots of other cocktail-related stuff like rapid infusions, foams, carbonating fruit, etc. (I’ll probably do a series on the bad-ass cocktail stuff you can do with them eventually because there is a lot. It shocks me that I don’t see five of them at every high-end cocktail joint.) They also will tolerate a much higher pressure than any other option, so if you like stuff kick-in-the-tongue fizzy, as I do, an ISI works wonders.

So I love my whipping siphon. But if you’re doing any serious carbonation work they (and things like the Perlini consumer system that use cartridges) are just too expensive and too inaccurate. However if you just want a siphon for other stuff and want to carbonate the occasional cocktail too then by all means grab one.

Home Carbonation Rig

carbonater

Had I known a year ago what I know now, I would have skipped straight to the last step. A home rig is both the cheapest and best method of getting carbonated drinks. It costs a little more than a SodaStream to get started, but the costs to operate are much, much less. Unlike a SodaStream, you can carbonate anything directly, rather than having to carbonate water and then mix it with a syrup. (The latter method leads to foam out, reducing carbonation, waters down cocktails, and makes a lot of drinks plain impossible.) And you can adjust your level of carbonation within a wide range, whereas a SodaStream and an ISI Whip make that difficult.

The CO2 cost of doing it yourself is far, far cheaper as well. A “60 L” SodaStream tank is 14.5 oz of CO2. At $15 per, that’s about $16.50 per pound. Getting it filled at your local homebrew or dry ice store costs about $1 per pound. Seriously, $1. It’s on the order of 2 cents a liter to carbonate. And you can get a 20 pound tank at a time, meaning it will make 900 liters instead of 40. You’ll drive to the store once every couple years instead of once a month.

Startup costs are a bit more than with SodaStream. I’ll get to the parts list in a later post, but the total price I paid was a little over $100. If you want to go high quality (which I recommend) you’re still looking at a sticker of less than $200. But from that point on your drinks are essentially free, so it will save you a ton over even the SodaStream over the years.

The home carbonation solution is also basically the same equipment homebrewers use to keg beer, with one very small addition. This means that if you decide to move into kegging your cocktails (or homebrew) you only need to buy the keg, which is about $60 used. You can also buy a counter-pressure filler for another $75 or so and start bottling your carbonated beverages if you want. So for less than $300, you can get a full bar-quality bottling operation going this way.

There are a few downsides to the home rig. One is that it’s rather unsightly. You wouldn’t leave it sitting on your counter. An ISI Whip is actually pretty, and some of the more expensive SodaStream’s aren’t bad. You can, however, tuck most of it in a cabinet and have only a hose protruding if you want. People have been very creative about hiding their home carbonaters, but just shoving it under a sink does the job.

Another is that it doesn’t get the ultra-high pressure an ISI Whip does. This doesn’t matter much in practice, as it goes well past what you’d realistically want to drink. You’ll generally top out around 45 PSI, and your home rig will go a bit past that, whereas an ISI can get to about 145 psi. You just can’t do rapid infusions in it like you can in an ISI.

The final downside, and the one I find most annoying, is that you need a steady supply of PET bottles. These are the bottles soda and seltzer come in at the store. The good news is a bottle lasts awhile, and I have a few that are for strictly water purposes that have been in continuous use for months. But if I carbonate a cocktail, I’ll only wash one out a few times before throwing it away.

(If any of you wonderful readers know where I can buy bulk unused 1 liter PET bottles, please let me know! Homebrew stores sell 500mL ones, but they’re pricier than just buying 1L of seltzer at the store and getting the bottle with it.)

Wrapping it All Up

Here’s a chart of the costs to get carbonated water with the four methods I discussed:

Setup Cost Per Liter Cost Cost 1 yr Cost 5 yr
Store Bought 0 0.75 273.75 1368.75
Siphon 80 0.7 335.5 1357.5
Soda Stream 80 0.38 218.7 773.5
Home Carbonater 150 0.02 1701 1901
  1. Assumes you have to buy 20 lbs of gas at a time.

Here’s a little chart describing the benefits/drawbacks of each solution as well.

ISI Whip SodaStream Home Carbonater
Volume Range .5-1L1 1L 0.25-2L2
Can carbonate liquids other than water? Yes No Yes
Can carbonate larger items, like pieces of fruit? Yes No No
Assembly required? None Minimal Minimal
Variable Carbonation Levels? Some3 Not really4 Fantastic5
Max PSI (approximate) 175 20 60
Other Uses? Lots (see articles on siphons.) None Beer Kegging
  1. Siphons have a static size. You could carbonate less than the full liter (or half liter if you get the smaller one) but you’ll get a slightly different result due to increased head space.
  2. Could be larger if you somehow found a PET bottle with the standard screw top that was over 2L.
  3. You can use different numbers of chargers, but don’t have very fine grained control.
  4. You can sort of press the button more or less, but this is very imprecise.
  5. Analog setting up to ~60 PSI allows for extremely precise control.

TLDR:

1. If you think you’re going to be doing a decent amount of carbonating, just go with the home rig. Get anything else and you’re going to end up getting the home rig sooner or later, I promise you. For carbonating liquids, especially cocktails, it’s cheaper in the long run and better than all of the other options.

2. Whipping siphons aren’t great buys for strictly carbonation purposes, but they do so much else that I highly recommend them. In fact there’s a good chance I’ll do many posts on siphons later. If you are only doing occasional carbonation work, then they’re all you need, and they’re still slightly cheaper than store bought seltzer.

3. SodaStreams just really aren’t better than the alternatives. They’re too limiting since they can carbonate only water, and they’re too expensive to operate. People only buy them because they don’t know better, but you, dear reader, do.