Tag Archives: Carbonation

The Latest (With In-Progress Recipe for Carbonated Paloma Jellies)

I feel like I’m that guy who updates every 6 months and says “sorry I haven’t written in a long time because BLAH BLAH BLAH”. Let’s skip that and just forgive each other. You forgive me for not writing more. I forgive you for, well, you know what you did.

Anyway, the latest. In anticipation of a special pop-up cinco de mayo event I’m doing, I decided to try to play with some new things. It’s at a great little cocktail bar called Crafted Cocktail, that does pretty much what the name implies. I like the bar and the people who own/run it and it’s just before camper season starts to kick in, so it’s perfect timing. I’d like to do a few more popups in various places throughout the year.

I also want to introduce people on both sides of the bar to some of the batched stuff I do, and because it’s in an honest-to-goodness bar, not a tiny camper, I’ve got a bit of room to play with. And it’s Cinco de Mayo so I wanted to throw a little Latin flair in there. Yes, I realize Cinco de Mayo is specifically Mexican, not pan-Latin, but I can only cram so many margaritas down white people’s throats, so I’m expanding the parameters a little bit. On the scale of cultural appropriation it’s a minor offense, right?

One thing I’ve been looking for an excuse to play with is jello shots. I was telling my fiancee awhile back about this idea I had of doing real cocktails in jello form. She of course showed me this book she had bought years earlier called Jello Shot Test Kitchen. Apparently someone beat me to the punch by about five years.

I flipped through the book and it ain’t bad for $10. I wish it were better, honestly. It’s pretty much just classic cocktails with gelatin in them. Which isn’t a bad thing, but if I could sum the entire book up with “make a cocktail and add 1 packet of Knox per cup of liquid.” But man are the pictures pretty.

I got to thinking, if I’m going to do Cinco right, there are a few cocktails I have to have in at least one form. Michelada. Margarita. And, possibly my favorite, the Paloma.

The traditional Paloma is just tequila and grapefruit soda, and while a perfectly serviceable cocktail as it is (especially when I make the grapefruit soda) I like to do mine with a little Campari. So my usual recipe is clarified grapefruit, tequila, Campari, agave, and lime-acid, which I then force carbonate. It’s one of those drinks that’s like a symphony, where every ingredient coordinates with every other ingredient individually.

Combining the two thoughts, I had the idea to basically gel my standard Paloma recipe and then try to carbonate it. I suspected that it would carbonate the same way a piece of fruit does because really, if you think about it, a jello isn’t actually a solid. It’s liquid water held in a matrix by gelatin. I’m not sure if you can carbonate solid ice (but I now plan to find out) but I know you can carbonate liquid water in a solid item, like you do in fruit.

For phase one I was testing with good old Knox brand gelatin. The recommendation is to use one packet (roughly 7g) per cup, but I wanted my gel to come out a little firmer than normal. I want patrons to be able to pick it up rather than slurp it out of a shot glass. Also, it’ll have to stand up to the heat of a bar for long enough to serve, and with gelatin the firmer you make it, the more heat stable, to a point. It’s also got alcohol which I hace read can have an adverse affect on the gelling (though it sounds like it’s pretty slight until you hit 40%.) And finally, it’s carbonated, so I want it to trap the bubbles in. I felt like a slushier gel (think the cups of Jello you eat with a spoon) would be overall less effective. So I knocked it up to almost 10 grams.

The final recipe I went with was really, really close. It needed just a tad more sweetness. I don’t know if jelling/chilling took some away or what. But overall I was happy with the results, and will be upping the agave just a touch next time. Here’s what try #2 will be.

Carbonated Paloma Jellies 1.0

2 oz grapefruit juice
1 oz tequila
.5 oz Campari
.5 oz lime
.5 oz agave nectar
5g gelatin

Mix grapefruit juice, lime, and agave in a pan and sprinkle gelatin on top. Let bloom for a few minutes. Bring to near-boil and blend with immersion blender.

While it’s heating, spray unflavored cooking spray onto silicone molds. Then wipe away as much oil as you can with a paper towel. You’ll not see any on the final product but will get a good release that way. (Thanks to Jello Shot Test Kitchen for that tip!) I used these but you can use any shape you want, or just put it in a loaf pan and cut it later.

Stir hot jello mix into liquor ingredients. Pour into molds and place in fridge. I tried mine 4 hours later and they were already fully gelled.

If you want to carbonate, at home the easiest way is an ISI Whip. I just used one CO2 cartridge on mine, because I was afraid too much pressure might cause syneresis. I seem to remember in some of the earlier gelatin clarification experiments people were using chamber vacs and causing it at atmospheric pressure alone! (I realize the sucking of the vacuum first was probably a major contributor, not just the pressure after, but I didn’t want to risk it.)

After one night in the fridge it came out mildly carbonated. Not bad. Not where I wanted it to be, but the CO2 was clearly dissolving, so I felt like all I had to do was wait. After two and a half days, I tasted it in the morning and it had champagne-levels of CO2 in it! It carbonated much better than any liquid drink ever does. It exploded in your mouth like a Pop Rock.

This is only the first version, of course. I’m going to play around with a couple things next.

First I want to garnish with Campari Salt. That’s basically a 50/50 mix of dehydrated Campari and salt. It’s as amazing as it sounds. It’s simple to make too, you pretty much just spread Campari in silicone molds and pop it in a really low oven or dehydrator. It takes forever, but is very low effort. Them you mortar and pestle up the crystals that result.

Second, I want to try layering it. I’ll probably make a layer of lime/tequila gelatin, a layer of Campari/agave/grapefruit gelatin, and a layer of just grapefruit gelatin. I even want to try yellow grapefruit instead of red for the middle layer to see if I can get it close enough to white to resemble the Mexican Flag’s colors when fully assembled. I thought about using white food coloring, but it looks like it all has titanium dioxide in it.

I also have to figure out a way to do this for restaurant service. ISI whips probably can’t carbonate more than a handful at a time. I’ve got a top-secret device I’m working on for that. If it works, I should be able to carbonate large amounts of fruits, jello shots, etc. at once.
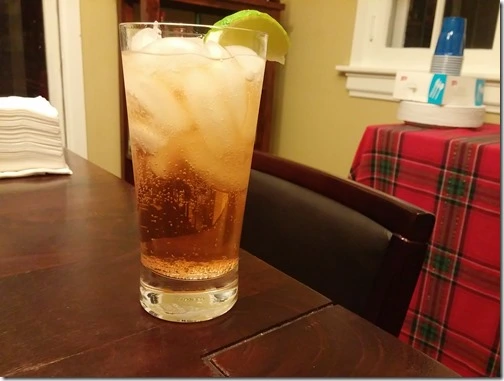
Carbonater

When I first started carbonating, it was with an ISI Whip. That did the job but ultimately I desired something that gave me more control over the level of carbonation (your options with an ISI are pretty much one canister or two) and at lower cost.

My next step was the home-built system. I already brewed beer so having a full kegging setup was appealing anyway.

I at first attempted to follow the instructions I’d heard from Cooking Issues. Purge the air from the bottle, lock the valve into place, and shake until I stopped hearing the CO2 hiss. The only problem I had was the valve never locked. I had to apply a pretty large amount of force (using two hands) to get the valve on at all, and if I let go it popped right off. So I would charge, shake, charge, shake, etc. Doing this about ten times was a pain in the ass but it did get the job done.

Because it was so much slower though, I tried to fix it. I bought a couple other Liquid Bread Carbonaters in case mine was broken. It wasn’t. I bought another ball lock gas disconnect in case that was broken. It wasn’t.

When Liquid Intelligence came out I noticed in one of the pictures that Dave was using the red carbonator. Mine were blue. I had known the different colors existed, but assumed that was the only difference. A lot of digging into product reviews made me realize it wasn’t.

The older red Carbonaters were better-designed. They allowed the valve to lock on, and the spring wasn’t as forceful so you could reasonably push the poppet valve down to let gas escape. The new ones are, some reason, got rid of both of those major advantages.

So I looked around on Amazon and found this. It’s a stainless steel version that does what the old Carbonater used to do. You can lock the disconnect on it just fine. It also has a hose barb at the end sized for standard beverage tubing (like you’d buy at the homebrew store) so you can inject the CO2 into the liquid, rather than the headspace above it, like you do in a SodaStream.

So I thought I’d just share this here. It ships from China so expect to get it a couple weeks after you order it. But it does seem to be very well-made and is much more pleasant to use than the unfortunately-redesigned Carbonater.

Force Carbonated Paloma #1

I often, when developing my own recipes, go through many attempts to get one right. This is a new series on one I am working on. You’ll get to see them in progress as I try to achieve perfection.

2014-12-25 23.22.19

Let me put this out there right off the bat: I fucking love palomas. They’re among the simplest of cocktails (tequila and grapefruit soda with a lime) and the tastiest. They please serious cocktail lovers and your average 11 p.m. barfly equally. Women love them. Men love them. They’re the Tom Hanks of cocktails. I don’t know why there isn’t one on every cocktail menu.

So one of the things I’ve been meaning to do with my newfound modernist toolkit is make a bad-ass paloma. Clarification and carbonation skills are really about all you need, and both of those are quite simple in this case. Grapefruit is pretty easy to clarify for a citrus. (See my Gin and Juice post for instructions.) It’s also great for batching, especially in a carbonated drink, because it doesn’t degrade like other citrus fruits. I’ve stored a gin and grapefruit juice with it for a week and it was perfectly fine. Dave Arnold says it even freezes well.

Making the soda myself should yield a much higher quality drink than simply buying Fresca, Jarritos, or what have you. While not bad, even the best commercial brands still don’t taste quite like fresh grapefruit. You also can’t really mix the ingredients without flattening the carbonation a bit, and most store-bought beverages aren’t bubbly enough for my taste to begin with. Using modernist techniques I should be able to get a bubblier, better tasting drink than anything you can get otherwise.

The process was pretty straightforward. I had some agar-clarified grapefruit juice leftover from my holiday party gin and juice. So I took a shot at my own paloma.

I wanted to try out acid phosphate, and I’m glad I did. I love this stuff! It adds a little brightness without the bitterness inherent to acids like lime and lemon. I might try mixing in a tiny amount of malic acid next time.

Here’s the first take on the recipe.

Paloma #1

12 oz. agar-clarified grapefruit juice

2 oz. agave nectar

4 oz. Tequila (I used Olmecca Altos Reposado)

6 oz. water

1 oz. Aperol

1 dropper saline solution

12 drops acid phosphate

Mix, chill, carbonate, serve in Collins glass with lime wedge and straw. Makes about 4 glasses. (I expected two but wasn’t accounting for how much ice is in a Collins glass).

Notes:

1. Might want to add a little clarified lime juice next time. This is one of the hardest things to do at home, since quick agar clarification without a centrifuge is a huge pain in the ass. I need to invest in a salad spinner anyway, since I want to do every Liquid Intelligence recipe for this blog and that’s one of them. I’m not sure it’s necessary; the acid phosphate is quite good at providing a little more tartness to the grapefruit juice. But it’d be good to try. Just having the drinker squeeze the wedge in worked fine though.

2. Might want to use a Blanco tequila next time. (Or maybe chitosan/gellan wash the Reposado? Would that give you a better flavor with a clearer color?) The initial coloration was an unappealing brown since the grapefruit juice is nearly clear. I added the Aperol for both color and flavor (I love the way it pairs with grapefruit) and I love the flavor, but the color is still not quite there. May have to swap out the agave nectar for fructose for the same reason. I’m not sure I would have felt the need to add the Aperol if I had used a Blanco, but I’m glad I did and will probably keep it.

3. I need to get a better measurement system for the acid phosphate. I think I should scale it. I love what it did for the flavor for sure. But the drops that come out of the bottle seem widely variable. My guess is this is about 1/4 oz. in this one. I’ll do better on that score next time. ChefSteps recommends 0.05%-0.1% phosphoric acid (not exactly the same as acid phosphate, but close) so I’ll try that. I also might dial it up just a notch if I don’t add clari-lime. Before the lime wedge went in, the drink wasn’t quite balanced, though maybe I should just allow for the fact that the drinker is likely to squeeze in a lime regardless.

4. It tasted good, but needed more tequila. I think next time I’ll just omit the water. Carbonated drinks always taste overly-diluted before you bubble it, but I think I had done some math wrong. I was aiming for 15% ABV and ended up at 6%.

Next time I’ll try

8 oz tequila

12 oz clarified grapefruit

1 oz Aperol

2 oz Agave nectar

Clarified Gin and Juice

This is part of my series of recipes from Liquid Intelligence. I’m going to make all of them, which you can see here.

One of Dave Arnold’s recipes I’ve been making for awhile is the Gin and Juice. I was able to find videos of it on the web, and piece together the process from his podcast. But there’s a recipe for it in Liquid Intelligence so I thought I’d make it for my family Christmas party. Apologies in advance for my worse-than-usual photography, but I was batching two cocktails and getting ready for a party.

This recipe isn’t particularly difficult, and is a great introduction to clarification. You can do it a few ways. If you don’t care about yield and just want a fast, easy product, you can use Pectinex/Chitosan/Keiselsol clarification (more on that later) and just wait a few hours for the solids to separate. Your yield is relatively low though without a centrifuge, on the order of 50-75%.

If you don’t mind waiting a bit longer, agar clarification is the way to go. That’s what Dave recommends, so for this post that’s what I did. It’s not that much more labor than the Pectinex/fining I mentioned, and the yield is much higher. I think I got over 90%. You’ll see my picture of the solids raft left at the end, that was all that didn’t make it, and some of that was agar.

Here’s the process:

Step 1: Juice the grapefruit.

I can’t remember how many I used, but it was most of a bag from Sam’s Club. (Sorry, I’m in Akron, we don’t have Costco yet.) I ended up with about a liter and a half.

2014-12-17 16.41.44

Step 2: Hydrate the agar

Divide the grapefruit, 75% in one batch (assuming it’s room temperature) that you’ll set aside, and 25% in another, that you’ll put into a pan. In my case,  I set 1.1 liters aside, and put 400 liters in the pan.

Measure out agar to 2g per liter, so in this case I used 3g. (I use Telephone brand packets. I ran out of this packet and had to go to the Asian market, all for 0.4 grams!)

2014-12-17 16.44.36

Whisk it vigorously into the small portion of juice. Place the pan on the stove, turn the heat to high and let it come to a boil, whisking frequently.

2014-12-17 16.46.28

When it boils, put a lid on the pan, drop the heat, and let it simmer for a few minutes.

Step 3: Temper the juice and set.

Pour the room temperature juice into the hot stuff, stirring vigorously. You want to avoid the mix gelling at all, which might happen if you did it the other way around, or didn’t boil enough of the juice.

Pour into a bowl and set over an ice bath to chill. Don’t agitate it at all. No stirring. Just wait for it to gel all the way through.

2014-12-17 16.55.52

Step 4: Freeze

Place the bowl into the freezer, and let sit overnight.

Step 5: Thaw

Place the frozen brick of agar in a strainer and let the liquid drip through. It starts off like this:


2014-12-18 14.26.22

and ends like this:

2014-12-19 18.34.08

Step 6: Filter

I ran what was left of the juice through a Chemex to suck up a little bit of particulate matter that got through.

Step 7: Mix ingredients and chill

I mixed up enough of Dave’s recipe to make about 1.65 liters, since I was carbonating in a 2 liter bottle. That worked out to a batch of ten. The recipe is:

590ml gin

800ml agar-clarified grapefruit juice

220ml water

40ml simple syrup

20 drops saline solution

I funneled them all into a 2 liter bottle, and put the bottle in the freezer. I shook it every 15 minutes or so, so it would chill evenly, and had to be careful to pull it out before it froze (the ABV is low enough that I think it would).

When it was ice cold, I carbonated with my homebrew rig.

 2014-12-20 16.37.04

Step 8: Play Snoop Dogg on radio and pour into champagne flute

2014-12-20 21.46.17

Make sure to have your mind on your money, and your money on your mind.

Carbonating Cocktails at Home Part 2: The Homebrew Rig

I’ve talked about a few solutions for carbonating cocktails, but there’s really only one if you’re serious: the homebrew rig. I call it the homebrew rig because it’s basically the same setup us homebrewers (yes, I am a man of all beverages) use for kegging our beer.

The setup is quite simple. Here are the parts you need. Prices are subject to some fluctuations, but I’m just using current Amazon prices as of October, 2014.

1. A CO2 tank. $68.95. You can get any size you like, but unless you’re running a bar and carbonating drinks on the regular, you won’t go through much of this stuff. Here is a 5 lb. tank on Amazon for under $70. A fill of that bad boy will probably last you six months to a year even if you, like me, like everything with a little fizz.

I got my tank from a dry ice shop near my house. They only charged me $50 for a used 10 lb. tank. They test and replace it when needed too, so I’ll never have to buy another. It’s old and ugly, but I keep it hidden out of sight.

clip_image002

For refills, anywhere that sells dry ice will usually do. Just let them know you’re using it for food. Also, many homebrew shops, which I prefer since they already know what you’re using it for and will sell the acceptable purity exclusively.

2. A dual gauge CO2 regulator. $46.90. This lets you adjust the pressure that you use in your carbonating vessel. Here’s the one I got. It’s decent, and cheap. I’d like it better if it were a little easier to adjust the pressure. It’s quite difficult to turn by hand, but a wrench makes it easy.

clip_image004

I’m getting ready to build a dual keg chest freezer, and am going to upgrade to a dual one so I can get a whole keg of a cocktail and/or seltzer in addition to one of beer going. I’m sure I’ll be posting on this bad boy setup later.

3. A ball lock gas coupler, and a gas hose. $16.29. This one has them both together. The hose needs to be pressure rated, and of the right size for your regulator and ball lock valve.

clip_image006

There are a couple ways you can screw up ordering this part. First, there are two different types of ball lock couplers, one for gas and one for liquid. Usually the gas ones are white and the liquid ones are black. If you are kegging a homebrew, the white one is what connects your pressure regulator to the CO2 inlet, and the black one connects the liquid outlet to your tap. For the purposes of carbonating beverages, rather than kegging, we don’t need a liquid coupler.

The other way is to get the wrong size hose. Usually your regulator will have a 5/16” barb on the end to connect the hose to. Keg couplers though come in ¼” and 5/16” for some reason. (Maybe there’s a ¼” regulator that I just haven’t seen.) Either way a 5/16” hose will probably clamp onto both just fine with a screw clamp, but you’d be safest buying them all to match. I got a 5/16” regulator, hose, and coupler.

4. The Carbonater. $12.64. This little bad boy screws onto any standard pop/seltzer bottle. Everything from the little single serving plastic Coke bottle you get at a gas station up to the 2 liter bottle. They all have the same cap.

clip_image008

5. Plumber’s tape. $3. For making sure to get an airtight connection between the coupler and the tank.

6. A good adjustable wrench for tightening the regulator. You probably have this one already so I’m not going to count it in the total. Also a screwdriver for turning the screw clamps that come with the hose.

7. A standard soda bottle. Just get a 1 liter of seltzer from your grocery store and save the bottle and cap. It’s useful to carbonate things in small quantities, or you’ll just end up re-carbonating the other half after the first one goes flat.

Total cost: $144.78. Not bad right?

The setup is incredibly simple, even if you’re totally inept and handyman activities like I am. Trust me, you’re very likely not as clueless as I am, and I did it in ten minutes.

Step 1. Connect regulator to the CO2 tank. Wrap a little bit of the plumber’s tape around the threads on the tank. Then screw the regulator on, tightening as much as possible with a wrench.

Step 2. Attach one end of the hose to the barb on the bottom of the regulator. Turn the screw clamp until tightened. Attach the other end (if it isn’t already) to the ball lock valve’s barbs, and tighten the screw clamp.

Step 3. Test for leaks. Get a glass and put a squirt of dish soap in it. Shoot water out of your sink’s sprayer into the glass to make a ton of bubbles. Take a sponge or paper towel and wipe those bubbles everywhere there is a connection. Where you screwed your regulator into the CO2 tank. Where you clamped the hose onto the regulator and barb. Turn on the gas. If there’s a leak, you’ll see the bubbles moving.

That’s it. Told you it was easy. Now let’s make our first carbonated cocktail. I’m going to go with an old-school carbonated classic, the Negroni.

In a 1 liter bottle, add:

6 fl. oz. gin

6 fl. oz. Campari

6 fl. oz. sweet vermouth

4 fl. oz. water*

*Note, because we’re chilling in our refrigerator, we don’t get the dilution you’d normally get if you stirred a Negroni with ice, so you want to add water. How much exactly is up to you. I use 25% as a launching point for drinks, but some I like more, some I like less. Let your taste-buds guide you. I find I like a Negroni a tad under-diluted, but your mileage may vary.

Put in your refrigerator until fully chilled. I’ll even go so far as to set the bottle in my freezer for a little bit after that before carbonating if I have time, just to get it extra cold. (Avoid freezing of course.) If you don’t want to wait you could instead omit the water, stir the Negroni with the correct amount of ice until it has chilled (which will give it the correct amount of water) and then pour it into the bottle.

When ready to carbonate, screw the Carbonater cap on most of the way. Squeeze the bottle until you’ve eliminated all of the air, and then finish tightening.

Set your pressure regulator’s gauge to the desired fizziness. I like about 35 PSI.

Attach the ball lock coupler to the Carbonater. You have to push down fairly hard to get the gas to flow through, which is a bit of a pain when the bottle is limp. I am told older Carbonaters were much easier to make work, but the current ones require a good bit of pressure. I thought mine was broken at first, so that is normal.

The bottle will fill and immediately grow from limp to rigid. Shake vigorously. When you do, CO2 will dissolve into the liquid and the bottle will go limp again. This is because dissolved gas takes up much less space than undissolved, forming a semi-vacuum above the liquid.

Keep repeating this process until the bottle no longer goes limp after shaking. Yes, I know, “that’s what she said” jokes abound here.

Place the bottle in your refrigerator for a bit. After a half hour or so, you can remove the Carbonater cap very slowly and replace the bottle’s normal cap if you so desire. Always remove caps slowly, as it will reduce loss of carbonation to foaming.

Your bottle will contain 4 servings of Negroni. If you don’t use it all at once, put the Carbonater back on and charge again, without shaking. Place the bottle back in the refrigerator. This will keep it from going flat.

Carbonating Cocktails at Home Part 1: Your Equipment Options

Note: This is the first in a series of posts I’m doing on carbonating your own cocktails at home. There will probably be at least 4 or 5 parts, including some recipes at the end. My plan is to publish 1 a week until they’re done, so if you’re interested, please stay tuned.

I like my beverages bubbly. Let me just state that right off the bat. Things just taste better with a little fizz.

Over the years, I’ve gotten my fizz fix by a number of different methods. I’ve purchased good old seltzers and tonics at stores. I bought an ISI Whip and a SodaStream. And finally, I built my own home carbonation rig. I’ll walk you through the options. I’m going to focus mainly on use for carbonating cocktails here, but mention where things are useful for something else.

Store Bought Seltzer

seltzer

Buying seltzer seems cheap, but it adds up. I easily go through a liter a day of bubbly water. At my local store, the generic brand, which is just carbonated reverse osmosis tap water, sells for 75 cents a pop. Over the course of a year that’s almost $300!

The upside is it’s easy. I was going to the store anyway, so there’s no real extra effort.

The downside (other than cost) is that seltzer is pretty much the worst possible way to add bubbles to any cocktail. You can’t add seltzer without also watering your cocktail down. And it tends to foam out due to agitation when you pour it or attempt to stir it into the drink. (This is why beverages that use it typically pour it in at the end, leaving a top watery layer above the cocktail.) Also, store bought seltzer is only mildly-carbonated to begin with and like I said earlier, I like my bubbles.

SodaStream

sodastream

A SodaStream just makes seltzer and is a minor step up from buying it. Their CO2 tank, which they claim can make 60 liters (and I find makes much less in practice, but I’ll be generous and say it is 40 liters) costs $45 on Amazon. That’s the same as just buying seltzer, but you have to buy the SodaStream too. You can get the tanks swapped at a store for $15 which makes it probably on the order of $0.38 per liter of seltzer, which to me is enough to justify the initial purchase if all else where equal, but not an overwhelming savings. Even the cheap SodaStream model is $70, and the good ones are closer to $100. You’ll want a spare cylinder or two so you don’t go empty, and a spare tank or two, but even still you’d break even over store bought seltzer in about a year or two.

It also lets you get your water a little fizzier than store-bought seltzer. I have never tested mine to see exactly how much CO2 gets in there, but it’s noticeably fizzier. You have a little control over how much CO2 you add as well, but not much. There’s no precise way to regulate it, you just push the button more or less.

The major drawback to the SodaStream is that you cannot carbonate anything but water directly. Want to make soda? You just make seltzer and then mix the syrup with it. (There’s no reason you couldn’t just buy the syrup and some seltzer from the store and make the same exact thing.) If you put anything else in the SodaStream, it can foam up and ruin the device. I learned that the hard way.

So it has all the downsides to store bought seltzer, plus having to deal with CO2 tanks. It is a little cheaper in the long run, but I really cannot recommend it over other methods unless you’re drinking nothing but carbonated water.

Whipping Siphons

isi

Whipping siphons also work and for a brief minute were my solution because I already had a couple. You can get a 1 liter whipping siphon for about $90 if you look around online. (You want the bigger one because you pretty much need 2 CO2 cartridges regardless, so you might as well get double the fizzy beverage and cut your cost in half.) I’m a huge fan of the ISI Gourmet Whip, which is a little pricier, but if you’re already going to spend that much you might as well plunk down a little extra for the better model.

There are two main problems with siphons for carbonating. The biggest is the price of CO2 cartridges. Ordered from the net in bulk you can get them as low as about 35 cents a cartridge. But to get sufficiently bubbly water requires 2 of them, so you’re looking at about 70 cents a liter. Not enough savings to be worth buying over store bought, though the upside is you’ll get heavily carbonated water for that price. The pressure achieved in an ISI is enough to carbonate slices of fruit.

The other problem is that you don’t have a lot of control over the levels of carbonation, as you are stuck with whole cartridges of CO2. You can partially vent them, doing sort of a pseudo half-charge (thanks for the tip on that on ChefSteps) but this is very difficult to get any accuracy with.

As for the benefits, you can carbonate cocktails better with one than you can with seltzer water or a SodaStream. And they’re awesome for lots of other cocktail-related stuff like rapid infusions, foams, carbonating fruit, etc. (I’ll probably do a series on the bad-ass cocktail stuff you can do with them eventually because there is a lot. It shocks me that I don’t see five of them at every high-end cocktail joint.) They also will tolerate a much higher pressure than any other option, so if you like stuff kick-in-the-tongue fizzy, as I do, an ISI works wonders.

So I love my whipping siphon. But if you’re doing any serious carbonation work they (and things like the Perlini consumer system that use cartridges) are just too expensive and too inaccurate. However if you just want a siphon for other stuff and want to carbonate the occasional cocktail too then by all means grab one.

Home Carbonation Rig

carbonater

Had I known a year ago what I know now, I would have skipped straight to the last step. A home rig is both the cheapest and best method of getting carbonated drinks. It costs a little more than a SodaStream to get started, but the costs to operate are much, much less. Unlike a SodaStream, you can carbonate anything directly, rather than having to carbonate water and then mix it with a syrup. (The latter method leads to foam out, reducing carbonation, waters down cocktails, and makes a lot of drinks plain impossible.) And you can adjust your level of carbonation within a wide range, whereas a SodaStream and an ISI Whip make that difficult.

The CO2 cost of doing it yourself is far, far cheaper as well. A “60 L” SodaStream tank is 14.5 oz of CO2. At $15 per, that’s about $16.50 per pound. Getting it filled at your local homebrew or dry ice store costs about $1 per pound. Seriously, $1. It’s on the order of 2 cents a liter to carbonate. And you can get a 20 pound tank at a time, meaning it will make 900 liters instead of 40. You’ll drive to the store once every couple years instead of once a month.

Startup costs are a bit more than with SodaStream. I’ll get to the parts list in a later post, but the total price I paid was a little over $100. If you want to go high quality (which I recommend) you’re still looking at a sticker of less than $200. But from that point on your drinks are essentially free, so it will save you a ton over even the SodaStream over the years.

The home carbonation solution is also basically the same equipment homebrewers use to keg beer, with one very small addition. This means that if you decide to move into kegging your cocktails (or homebrew) you only need to buy the keg, which is about $60 used. You can also buy a counter-pressure filler for another $75 or so and start bottling your carbonated beverages if you want. So for less than $300, you can get a full bar-quality bottling operation going this way.

There are a few downsides to the home rig. One is that it’s rather unsightly. You wouldn’t leave it sitting on your counter. An ISI Whip is actually pretty, and some of the more expensive SodaStream’s aren’t bad. You can, however, tuck most of it in a cabinet and have only a hose protruding if you want. People have been very creative about hiding their home carbonaters, but just shoving it under a sink does the job.

Another is that it doesn’t get the ultra-high pressure an ISI Whip does. This doesn’t matter much in practice, as it goes well past what you’d realistically want to drink. You’ll generally top out around 45 PSI, and your home rig will go a bit past that, whereas an ISI can get to about 145 psi. You just can’t do rapid infusions in it like you can in an ISI.

The final downside, and the one I find most annoying, is that you need a steady supply of PET bottles. These are the bottles soda and seltzer come in at the store. The good news is a bottle lasts awhile, and I have a few that are for strictly water purposes that have been in continuous use for months. But if I carbonate a cocktail, I’ll only wash one out a few times before throwing it away.

(If any of you wonderful readers know where I can buy bulk unused 1 liter PET bottles, please let me know! Homebrew stores sell 500mL ones, but they’re pricier than just buying 1L of seltzer at the store and getting the bottle with it.)

Wrapping it All Up

Here’s a chart of the costs to get carbonated water with the four methods I discussed:

Setup Cost Per Liter Cost Cost 1 yr Cost 5 yr
Store Bought 0 0.75 273.75 1368.75
Siphon 80 0.7 335.5 1357.5
Soda Stream 80 0.38 218.7 773.5
Home Carbonater 150 0.02 1701 1901
  1. Assumes you have to buy 20 lbs of gas at a time.

Here’s a little chart describing the benefits/drawbacks of each solution as well.

ISI Whip SodaStream Home Carbonater
Volume Range .5-1L1 1L 0.25-2L2
Can carbonate liquids other than water? Yes No Yes
Can carbonate larger items, like pieces of fruit? Yes No No
Assembly required? None Minimal Minimal
Variable Carbonation Levels? Some3 Not really4 Fantastic5
Max PSI (approximate) 175 20 60
Other Uses? Lots (see articles on siphons.) None Beer Kegging
  1. Siphons have a static size. You could carbonate less than the full liter (or half liter if you get the smaller one) but you’ll get a slightly different result due to increased head space.
  2. Could be larger if you somehow found a PET bottle with the standard screw top that was over 2L.
  3. You can use different numbers of chargers, but don’t have very fine grained control.
  4. You can sort of press the button more or less, but this is very imprecise.
  5. Analog setting up to ~60 PSI allows for extremely precise control.

TLDR:

1. If you think you’re going to be doing a decent amount of carbonating, just go with the home rig. Get anything else and you’re going to end up getting the home rig sooner or later, I promise you. For carbonating liquids, especially cocktails, it’s cheaper in the long run and better than all of the other options.

2. Whipping siphons aren’t great buys for strictly carbonation purposes, but they do so much else that I highly recommend them. In fact there’s a good chance I’ll do many posts on siphons later. If you are only doing occasional carbonation work, then they’re all you need, and they’re still slightly cheaper than store bought seltzer.

3. SodaStreams just really aren’t better than the alternatives. They’re too limiting since they can carbonate only water, and they’re too expensive to operate. People only buy them because they don’t know better, but you, dear reader, do.